Akoya studs

Happy Huku

Well-known member
Joined
Aug 28, 2012
Messages
748
There are often questions about drill holes and the difference a millimetre or two make to the size of a pearl so I thought I'd post a few photos of my akoya studs as an example...
A few years ago a dear friend gave me these earrings for my birthday. They belonged to his wife, they measure 6.8mm on my husband's vernier and I'd say they are at least 40 years old. They were re-glued at the time then came undone again!
I took these photos of the drill holes (not the dirt and the cat hair!):
 

Attachments

  • Pearl studs1.jpg
    Pearl studs1.jpg
    130 KB · Views: 36
  • Pearl studs2.jpg
    Pearl studs2.jpg
    90.6 KB · Views: 37
I collected the newly re-glued earrings the other day, not the best of glue jobs but never mind, they are back home and wearable.
Question - what product could I use to get the excess glue off or is it too late now the glue has set?

Earings3.jpg

Earings2.jpg
 
I then got out the earrings my parents gave me for a birthday at least 30 years ago to compare...
They measure 5.7mm on my husband's vernier.
 

Attachments

  • Earings4.jpg
    Earings4.jpg
    97.1 KB · Views: 29
These are the side by side photos showing the difference between 6.8mm and 5.7mm earrings.
I love the subtle colour differences and of course the sentimental value of these lovely gifts.

Earings5.jpg

Earings1.jpg
 
And then of course the very hard to do ear shot of the 6.8mm studs...

My goodness, I take my hat off to all those wonderful pearly photographers out there who regale us with beautiful photos of themselves wearing their pearls!

PS
It popped up in another thread - the problem of one's ears reacting to one's earrings. I now rub a tiny bit of 'Bractroban' (an antibiotic ointment) on my ear lobes AND on the earring posts and butterflies. Works a treat.
 

Attachments

  • Earings.jpg
    Earings.jpg
    51.5 KB · Views: 32
Many times the problem will be a reaction to nickel in the metal. 40 year old metal will probably contain nickel, as will many findings of American manufacture. If you react to nickel look for findings manufactured to EU standards (no nickel no lead).
 
Did a professional jeweler glue those? What kind of glue did they use? There should not be excess glue showing.
 
Many times the problem will be a reaction to nickel in the metal. 40 year old metal will probably contain nickel, as will many findings of American manufacture. If you react to nickel look for findings manufactured to EU standards (no nickel no lead).

Yes, I worked out my reaction to nickel many years ago and only wear gold now.
However, a few years ago, I was struggling with all my earrings. Despite my cleaning them every time I put them on, my earlobes reacted and I could only wear them for a couple of hours. Seemed like some sort of infection that had built up over the years and the antibiotic ointment sorted it out.
 
Did a professional jeweler glue those? What kind of glue did they use? There should not be excess glue showing.


Yes, not sure what sort of glue they used.
And yes, I know there should be no glue showing, I didn't check the earring at the time and for various reasons, I'm not going to tackle it with the gluer so suggestions for cleaning are welcome!!
Next time I will put the glue question to the forum and do it myself!!!
 
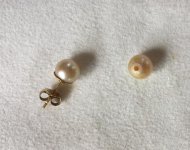
The drill holes appear to be a bit too large. The optimal hole size for most findings is 0.8 mm, a size that can be widened to just about fit any post when needed. If the drill holes are that large, the best solution would be to use a larger peg if possible.

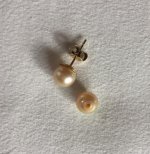
You're seeing glue around the edges because the glue wasn't used "only" on the peg. It also went into the cup.

There is a technique to setting pearls that will keep almost all of the glue in the drill hole and very little under the cup. When setting the pearl, if you can get a ball of epoxy at the very end of the peg when you're holding it pointed down (not vertically but between 45 and 90 degrees) and then insert into the drill hole directly without hitting the surface of the pearl, most of the glue will remain in the drill hole. The ball of epoxy looks like a drop of water balling up but not quite ready to fall.

If the epoxy is placed in the cup, or if the ball of epoxy moves from the end of the peg into the cup, it causes a problem. First, you don't have the epoxy sufficiently in the drill hole and secondly, the epoxy has to go somewhere when the pearl is pressed into the cup. That's when it comes out around the edges.

This is a technique everyone who does production at our office has to learn. Once it is mastered, they can set pearls quickly and effectively. But in the beginning, they will spend a lot of time cleaning the excess epoxy from around the cup.

The easiest way to remove that excess epoxy is with Attack, we've found. After the epoxy dries or even while it is drying, dip a pointed Q-tip into Attack, and rub it around the cup on the excess epoxy. You may have to keep running and dipping the point in attack for 30 seconds or so. Some of the epoxy will start to come off, and most of the time, when it is ready, you can peel the entire strip off all together with your fingers after it becomes pliant.

After you're able to get it off, give the pearl one more swipe with a clean tip dipped in Attack and you should be good to go.
 
Thank you Jeremy, really appreciate that information and will look into getting some "Attack".
I see now what you mean about the drill hole and suspect they will continue to come unglued until I replace the peg with a larger one.
 
Back
Top